Speak Another Language?

Saturday, June 21, 2014

Chickpea, Edamame and Basil Salad

Who doesn’t LOVE basil, especially freshly picked from an herb garden? Incorporating this delicious herb and others like it into salads throughout the summer is a wonderful way to add a fresh look and taste.   Next time you need a side dish for a cookout, try this delicious salad!  While this recipe is delicious served on its own, serving it over leafy greens can change it from a side dish, to a main dish!  Enjoy!

What You Will Need:
2 cups cooked chickpeas (garbanzo beans)
1 cup cooked edamame (or cooked peas)
1 organic red bell pepper, chopped
1/4 cup red onion, chopped
1 cup cucumber, peeled, seeded, diced
1/4 cup packed fresh basil leaves, chopped
1 clove garlic, minced
1/4 cup fresh lemon juice
1 tbsp extra virgin olive oil
Dash of sea salt
1/8 tsp cracked black pepper

Directions:
  1. Combine chickpeas, edamame, bell pepper, red onion, cucumber, and basil in a mixing bowl.  Toss to combine and set aside.
  2. In a separate bowl, prepare the dressing by combining the garlic, lemon juice, olive oil, sea salt, and cracked black pepper.  Whisk until ingredients emulsify.
  3. Pour dressing over the chickpea mixture while tossing ingredients to ensure everything is completely coated. Serve and enjoy!


Friday, June 13, 2014

Fruit Kabobs

This month the Healthy Edge Online Community is discussing a topic that is very important to many people: Healthy On A Budget!  Many people have the thought that “healthy eating this” is expensive, but this is far from the truth!

During summer break it may feel as though your kids have a bottomless stomach!   It doesn’t take long to get fed up from hearing, “I’m hungry”, multiple times during the day. It is also easy to feel overwhelmed and give into purchasing the “convenient” foods that will just SHUT THE KIDS UP ALREADY! But convenience comes as a cost. What are these foods doing to your children’s health?  AND…Have you ever added up the amount of money that these “convenience” and so called “economical” foods cost you?  You may be shocked!

At The Healthy Edge, we are firm believers in creating a safe environment for your family.  If you bring the food into your home, YOUR FAMILY WILL EAT IT, whether it is processed or whole foods.  It’s time to break through your belief systems and old habits and give your family a healthy, happy summer!

Fruit Kabobs are a great “go to” snack throughout the day and make a perfect addition to any cookout! Actually anything on a stick seems to be a hit with the kiddos (big and small).

What you Need:
Fruits or Vegetables
Wooden Skewers

Preparation:
Wash and cut your fruits or vegetables into bite size pieces, put in containers with lids, store in the refridgerator.  That’s it!!

Assembly:
Take the containers out of the refrigerator, set up a buffet, give your kids a stick and let them create their own kabob.  Done!

The biggest thing with kids (and parents) is keeping it simple and fun (and sometimes clean).  Each week you can mix up the fruits or vegetables you use so they don’t get burned out on the same ones.  And the wonderful thing about fruits and veggies are the colors!  Try making holiday kabobs for your next celebration.

Sunday, June 8, 2014

Freezing Strawberries

Strawberries are a delicious indicator of summer. How can you not LOVE the look, smell and taste of this amazing fruit. The problem is that strawberry season is short-lived and buying strawberries out of season leaves you wondering where they came from and how far they had to travel to get to the grocery store.

If you are growing strawberries in your garden or a planter box, there is a wonderful benefit to the abundance of strawberries you can collect. If you do it right, you can freeze these beauties and enjoy them all year long. If you do it wrong (which we have learned and therefore is why we are writing this blog), you will simply have a big red frozen glob of strawberries with freezer burn. This is disappointing and we would like to support you in avoiding this mistake.

If you don’t have your own strawberries, it’s amazing how many people have an overabundance of strawberries they might not mind sharing. You can also purchase at local farmer’s markets (which is what we like to promote) or your local grocery store.
Here is a great guide to freezing strawberries:

What You Will Need:
Fresh Strawberries

Large Bowl with cold water
Paring Knife
Strainer
Cookie Sheet

Step One: Get your berries J   You will want to freeze your strawberries when they are fresh so you do not lose flavoring or nutrients.

Step Two: Rinse the berries in cool water.  Be sure to not leave them in the water too long or you will lose flavor.  From the water, pick through the berries and put them in a strainer for about 3-4 minutes and then gently pat them dry.


Step Three:  Hull the berries (remove the green stems) and remove and spoiled or soft spots on the berries.

Step Four: Place the strawberries in a single layer, not touching each other, on a cookie sheet.  Put cookie sheet in the freezer overnight or until berries are frozen completely.

Step Five: Transfer strawberries to an air-tight container or freezer bag.  Label with date and content and store in the freezer for up to six months.


These steps can also be followed for raspberries, blueberries, blackberries and grapes.  If you know someone with an overabundance of apples be sure to try our Ez Homemade Applesauce!  Does anyone have any other tips for preserving fruits?


Sunday, June 1, 2014

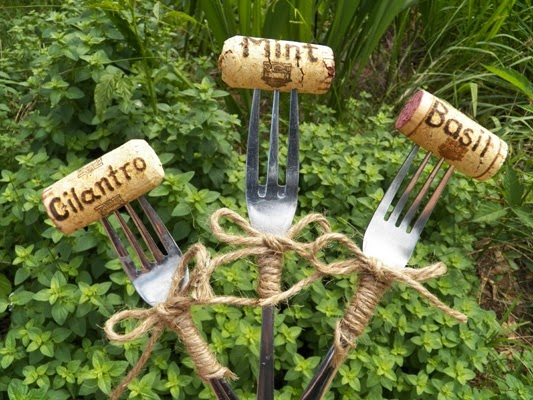
Grow Your Own Herbs


The flavor and smell of fresh herbs blows away any bottled spice or herb we have sitting in our cupboards. It also guarantees that they are NOT expired. There is also nothing more frustrating than spending money on fresh herbs (especially organic), using two sprigs and then watching the rest slowly die and mold because you didn’t use the rest in time.  It’s time to stop wasting your money but also allow yourself to use fresh herbs in your cooking. What if you had unlimited access to a variety of herbs in the comfort of you own backyard, deck or porch?  All it takes is a little time, space and energy to create your own herb garden.


Step One: Pick Your Favorite Herbs

Here are some tips:


Rosemary: Prefers a drier soil.  Full Sun.  Plants grow quite large, cut branches back by few inches to keep shape and size you prefer.
Thyme: Prefers a drier soil.  Full Sun.  Can be used as a ground cover. 
Basil: Annual Plant.  Full Sun.  Well drained soil.  Water often in hot weather.
Oregano: Well drained soil. Full Sun.
Cilantro: Well drained soil.  Full Sun.  Cut before flowering occurs.  If you let flower, it will turn into coriander seeds (must leave flower to dry).
Chives: Well drained moist soil.  Full Sun.  When flowers bloom, remove or seeds will spread.
Parsley: Full to partial sun. Prefers moist soil


More tips:


*Keep herbs weeded.  As is true with most plants, they do not like to compete for nutrients and water.
*Many herbs do not take well to cold harsh winters.  Many can be transferred inside and last all winter long as long as they have enough sunlight.  

Step Two: Choose Your Garden Location
Location can be the key to your herb garden.  Sun is essential to many herbs, although there are some that may not require the sunlight that others do.  Be sure to read up on the herbs you decide to grow to choose the best location.
Herbs can be easily grown indoors with the right amount of lighting.  Many herbs require 6-8 hours of sunlight each day.  

Step Three: Choose Your Containers
Once you have figured out your location for your herb garden, it’s time to figure out what you will grow them in.  There are so many different materials to use depending on your style.  Here are some neat ideas we found to get your creative juices flowing.


Tips:
·       Containers should be at least 6 inches wide if only growing one herb in it.
·       If you are planning on using large containers combine two or more plants into one. (Be sure to research herbs you wish to combine to be sure they all require the same amount of sunlight and water)
·       Be sure containers have good drainage (this could include poking a decent sized hole into the bottom to allow excess water to drain.


     Step Four: Planting your Herbs

Potting Mix: For container gardens, it is actually preferable to use “Potting Mix” rather than “Potting Soil”.  What is sold as "potting soil" is likely to be poor-quality and sticky with poor drainage. "Potting mix" is lighter, made mostly from organic matter such as peat or composted plant matter, and designed to give container plants the texture and drainage they need.  Try to find potting mix with slow-release or organic fertilizer pellets in it to avoid having to fertilizing every few weeks.
Water: Potting mix can dry out quickly so be sure to check the soil often by sticking your finger into the soil.  If it feels dry an inch beneath the surface, it’s time to water.
Pruning: Each herb is different when it comes to pruning.  Be sure to research for each specific herb.

Step Five:  Enjoy!
Herb gardens are a wonderful way to add greenery and fragrance to your living space.  Once your herb garden takes off, you can enjoy fresh herbs with a snip of the scissors. 
We would love to hear what’s in your herb garden!

Twitter Delicious Facebook Digg Stumbleupon Favorites More